How to unbrick your wi-fi router after a bad OpenWRT firmware flashing
The Linux philosophy is ‘Laugh in the face of danger’. Oops. Wrong One. ‘Do it yourself’. Yes, that’s it.
― Linus
About 9 years ago I wrote a post explaining how to turn your wi-fi router in a NAS and Media Server with OpenWRT (pt-BR) and it’s was a huge success. By far is my most viewed post until now.
In the post I warned about the risks of doing that procedure since you could end with an expensive paperweight. And so, I was caught in my own trap: I tried to update the OpenWRT version and bricked my router 🤦♂️
Mistakes were made
Skip to next section if you just want to know how to unbrick it. No judging.
The router was running flawlessly for about 8 years, no issues at all. But going against the common sense that says “don’t change the team that was winning”, I decided to update the OpenWRT to the latest supported version. And instead of flashing the update image recommended by OpenWRT, I choose to do it from scratch to have a “clean” installation. What’s could go wrong?
First step, revert to stock firmware downloaded directly from the TP Link official site. All good, the router rebooted with the original firmware running. Second step, flash the OpenWRT image. Selected the .bin file, uploaded it, the router rebooted and… nothing. No leds blinking, no signal of booting procedure, only the power led static on.
At this point, I accepted that the router was bricked. So, let’s try to bring it back to life.
TFTP recovery
Following the official unbrick article from OpenWRT, basically the bootloader has an embedded recovery mode used to transfer the firmware image file through tftp. So, just need to to this:
- Connect a cable on your PC to a LAN port of the router and configure the ethernet connection with the fixed IP 192.168.0.66 mask 255.255.255.0; [use tcpdump to discover the IP for your router, as explained on official article]
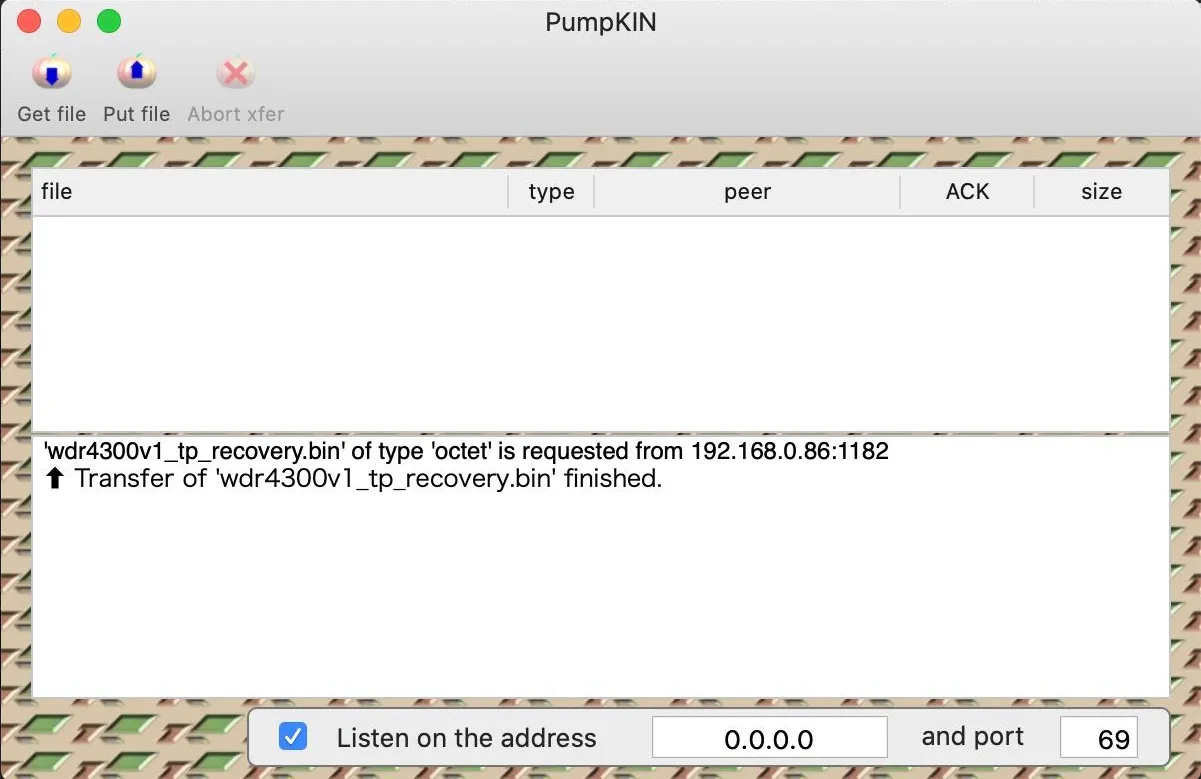
- Download and configure a TFTP server on your PC. Linux and Mac should have a pre-installed command line but not worked for me. I’m using MacOS and the best solution that I found was PumpKIN. Just download and open the application;
- Disconnect from wi-fi or any other active network; [recommended]
- Power the router on and after all leds turn off (about 1 second later), press and hold the reset button for about 4 seconds until the last led turn on and keep this way;
- Back to PunpKIN, the router will request the file wdr4300v1_tp_recovery.bin. Just rename the firmware image to requested filename and put it on configured dir on PunpKIN.
- If everything works, the file will be copied to router in about 30 seconds. Wait more 2 minutes to image be installed on router (if you are a lucky one) and reboot it.

But for me, didn’t worked. The file was copied but after a reboot, the router continue doing the same (which was nothing).
TFTP and RS232 (serial)
The easy way didn’t worked. Something went wrong after copy the firmware to router though tftp and I need to see what’s going on.
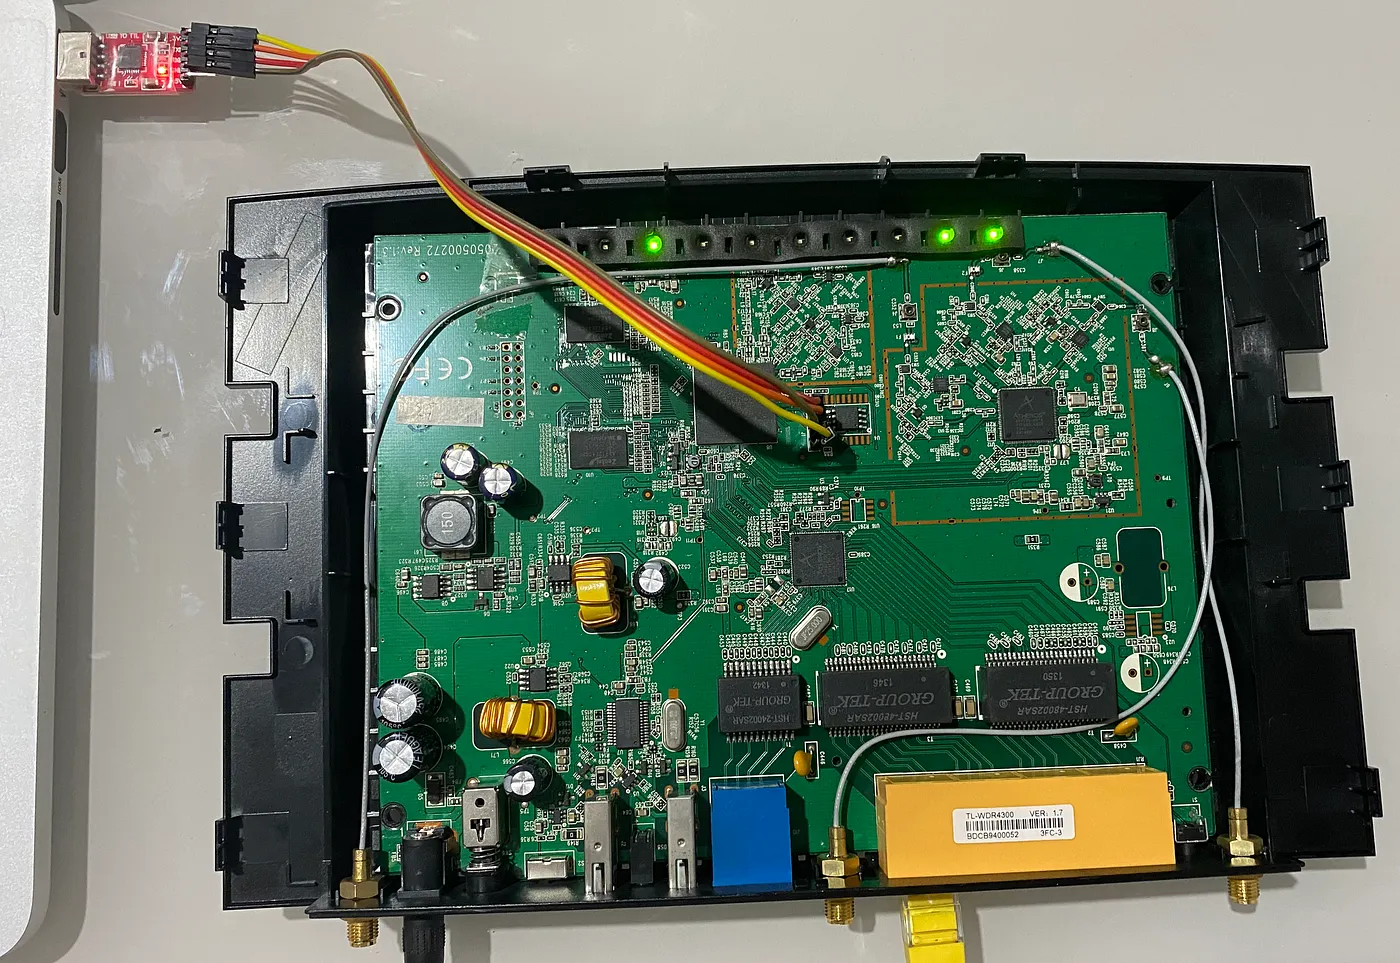
The only way to open a TTY terminal to router is though serial interface, but it’s not trivial either: you need to open the device, connect/solder some cables on serial pins and use a serial adapter on your PC.
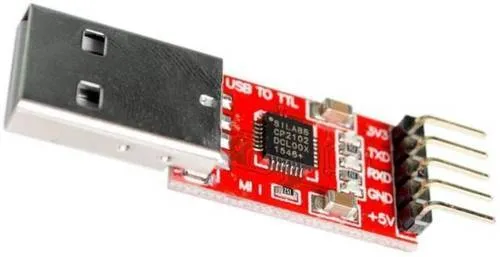
Luckily I bought an USBtoUART dongle from AliExpress a couple of years ago:

Used dupont wire jumpers to connect the UART to router board serial contacts. Remember to connect the TX and RX on inverted way. RX on dongle will read from TX of board and vice versa, as follows:
TXD ---------------- RXD
RXD ---------------- TXD
GND ---------------- GND
Now with the wires connected to router board, just power it on. It will “work” normally and you’ll be able to debug the serial using a terminal on PC.

In my case, I just used screen:
screen /dev/tty.SLAB_USBtoUART 115200
And as soon I saw the bootlog, I confirmed my suspect:
U-Boot 1.1.4 (Jun 17 2013 - 12:31:57)
U-boot DB120
DRAM:  128 MB
id read 0x100000ff
flash size 8MB, sector count = 128
Flash:  8 MB
Using default environment
PCIe Reset OK!!!!!!
In:    serial
Out:   serial
Err:   serial
Net:   ag934x_enet_initialize...
No valid address in Flash. Using fixed address
 wasp  reset mask:c03300
WASP  ----> S17 PHY *
: cfg1 0x7 cfg2 0x7114
eth0: ba:[redacted]:41
athrs17_reg_init: complete
eth0 up
eth0
Autobooting in 1 seconds
## Booting image at 9f020000 ...
   Uncompressing Kernel Image ... Stream with EOS marker is not supportedLZMA ERROR 1 - must RESET board to recover
The firmware image could be corrupted (or invalid). The boot process is happening but fails to boot the kernel on address 9f020000.
Then I tried to flash the image again. Maybe this time I can see the error on terminal. Just repeated the TFTP recovery process described earlier and got this:
U-Boot 1.1.4 (Jun 17 2013 - 12:31:57)
U-boot DB120
DRAM:  128 MB
id read 0x100000ff
flash size 8MB, sector count = 128
Flash:  8 MB
Using default environment
PCIe Reset OK!!!!!!
In:    serial
Out:   serial
Err:   serial
Net:   ag934x_enet_initialize...
No valid address in Flash. Using fixed address
 wasp  reset mask:c03300
WASP  ----> S17 PHY *
: cfg1 0x7 cfg2 0x7114
eth0: ba:[redacted]:41
athrs17_reg_init: complete
eth0 up
eth0
dup 1 speed 1000
Using eth0 device
TFTP from server 192.168.0.66; our IP address is 192.168.0.86
Filename 'wdr4300v1_tp_recovery.bin'.
Load address: 0x80060000
Loading: #################################################################
#################################################################
#####################################################
done
Bytes transferred = 8258048 (7e0200 hex)
original_product_id = ffffffff
 original_product_ver = ffffffff
 recovery_product_id = 10430001
 recovery_product_ver = 01
 auto update firmware: product id verify fail!
Autobooting in 1 seconds
## Booting image at 9f020000 ...
   Uncompressing Kernel Image ... Stream with EOS marker is not supportedLZMA ERROR 1 - must RESET board to recover
The image was transferred but the “auto update firmware” fails to verify the product id ¯\_(ツ)_/¯.
So, I’ll need to write the firmware update manually.
Manual firmware flashing
Luckily there is a way to install the firmware manually thanks to this post:
- Restart the router and after the message “Autobooting in 1 second” type “tpl” and hit Enter. This need to be done in less than 1 second, but if you are fast enough, the boot will stop on prompt “db12x>” and you can run commands manually;
- Run “tftpboot” to start the TFTP server with default parameters. Take note of the server IP and “Load address: 0x81000000”, it’ll be used later. Hit ctrl+c to stop the tftp server;
- Configure your PC ethernet interface to IP shown in the previous step and prepare PunpKIN to put the firmware image again;
- Start the TFTP server again with the load address obtained on step 2 and with the filename already defined on TFTP transfer earlier:
db12x> tftpboot 0x81000000 wdr4300v1_tp_recovery.bin - After firmware was transferred, erase the destination flash 0x9F020000 (which we know from the initial captured output) and destination length being the size of the transferred firmware image 0x7C0000 bytes:
db12x> erase 0x9f020000 +7c0000 - Now just need to copy the transferred firmware to the destination flash:
db12x> cp.b 0x81000000 0x9f020000 0x7c0000 - All good. Reboot the router and pray:
db12x> reset
Follow below the full command logs:
U-Boot 1.1.4 (Jun 17 2013 - 12:31:57)
U-boot DB120
DRAM:  128 MB
id read 0x100000ff
flash size 8MB, sector count = 128
Flash:  8 MB
Using default environment
PCIe Reset OK!!!!!!
In:    serial
Out:   serial
Err:   serial
Net:   ag934x_enet_initialize...
No valid address in Flash. Using fixed address
 wasp  reset mask:c03300
WASP  ----> S17 PHY *
: cfg1 0x7 cfg2 0x7114
eth0: ba:[redacted]:41
athrs17_reg_init: complete
eth0 up
eth0
Autobooting in 1 seconds
db12x>
db12x> tftpboot
dup 1 speed 1000
*** Warning: no boot file name; using '6F01A8C0.img'
Using eth0 device
TFTP from server 192.168.1.100; our IP address is 192.168.1.111
Filename '6F01A8C0.img'.
Load address: 0x81000000
Loading: T T T T T T
TFTP error: 'not found' (1)
Starting again
(ctlr+c pressed)
Abort
db12x> tftpboot 0x81000000 wdr4300v1_tp_recovery.bin
Using eth0 device
TFTP from server 192.168.1.100; our IP address is 192.168.1.111
Filename 'wdr4300v1_tp_recovery.bin'.
Load address: 0x81000000
Loading: #################################################################
#################################################################
#################################################################
############################
done
Bytes transferred = 8126464 (7c0000 hex)
db12x> erase 0x9f020000 +7c0000
First 0x2 last 0x7d sector size 0x10000                                                                                                                                                                  125
Erased 124 sectors
db12x> cp.b 0x81000000 0x9f020000 0x7c0000
Copy to Flash... write addr: 9f020000
done
db12x> reset
The triumph
If you do all commands right and with a bit of lucky, the router should boot normally and the LuCi be accessible on 192.168.1.1 after few minutes.
Enjoy o/
References
Lastest Posts
- 05 Jan 2026 What 6 months of PHP/Laravel taught me as a Ruby/Rails developer
- 18 Dec 2025 My thoughts about AI tools, vibe coding, and some predictions about the future of programming
- 29 May 2025 Useful Ruby methods and tips that you might not know (or remember)
- 14 Apr 2025 I've been writing software for the last 25 years. Here are a few more things I've learned so far (part 2)
- 16 Mar 2025 How to backup your photos from Google and fix the Exif metadata